On January 15th, 2020, Microsoft released the new Microsoft Edge browser based on the Chromium platform. I wrote a blog early January describing this change which can be found here.
There are few ways to manage the configuration of Edge settings to enforce security as well as control the updates to Edge. The two most common methods available to the legal community are via Group Policy or Microsoft Intune.
Using Group Policies
Download the latest Administrative template files at https://www.microsoft.com/en-us/edge/business/download

Drop the ADMX and ADML files in the PolicyDefinition folder on a local PC for testing in your Central Store. If you are not using Central Store to manage your enterprise GPO Administrative templates, I highly recommend it. Here’s a link to help you create and manage a Central Store.
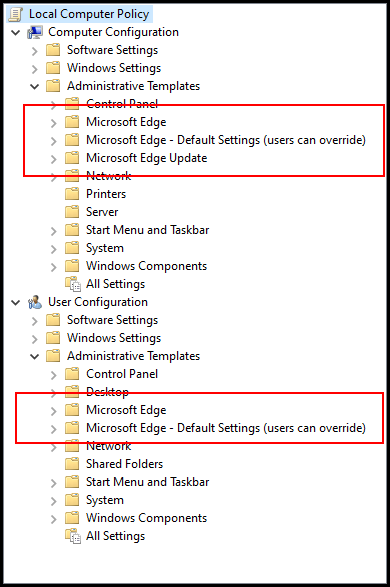
Launch the Group Policy Management MMC and create a new GPO specific to Edge Chromium management. Right-click and edit your new GPO, once the GPO templates are loaded, you will see the new Edge Chromium settings under Administrative Templates in the Computer Configuration as well as the User Configuration nodes. As you will see, Edge now supports Default settings where the users can override while also have mandatory settings (users can’t override). We recommend making changes in the Computer Configuration section.
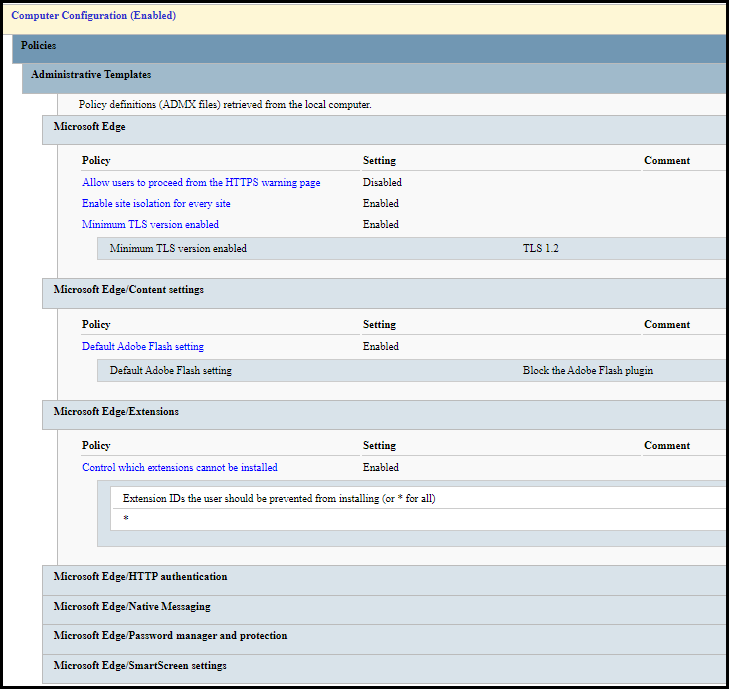
Microsoft has also released security baselines recommendations for Edge last December. You can find the information and the baseline download here.
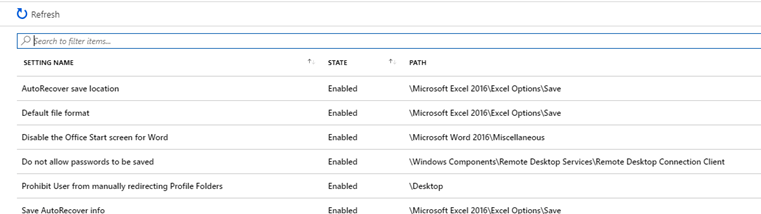
The download includes the baseline GPOs, spreadsheets outlining changes, HTML output of the GPO, and PowerShell scripts to import the GPOs into your AD or local PC. The screenshot below is an example of a few settings available to you.
Enable IE Mode
If you have a legacy site that still relies on Internet Explorer, the new Edge browser comes with IE Mode. In Group Policy editor, go to the Computer Configuration > Administrative Templates > Microsoft Edge and find the setting Configure Internet Explorer integration. Configure the setting to Enabled and choose between Internet Explorer mode and Internet Explorer 11. The Internet Explorer mode will open the site in Edge in IE mode where Internet Explorer 11 option will open in the standalone Internet Explorer 11 window. We recommend Internet Explorer mode for the best user experience.
Now Configure the Enterprise Site list as described here to add the policy file that includes which sites need IE mode.
You also have the option to Send all intranet sites to Internet Explorer by enabling that setting in the same location as the Configure Internet Explorer integration. Please don’t do this, the legal vertical needs to stop using Internet Explorer.
Using Microsoft Intune
If you have embraced Intune for the MDM as well as managing Windows 10 through Intune only or with Co-Management with Configuration Management, you can configure Edge settings via Intune.
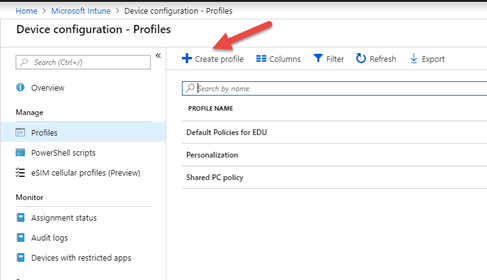
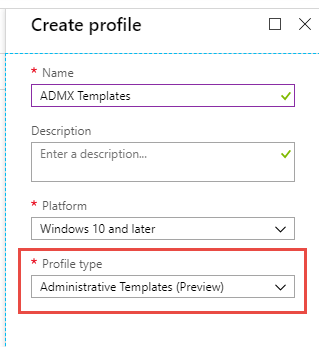
Sign on to your Azure portal, select Intune and from the Intune blade, select Device Configuration, and then Profiles. Create a new Profile and choose Windows 10 as the Platform and Administrative Templates for Profile type.

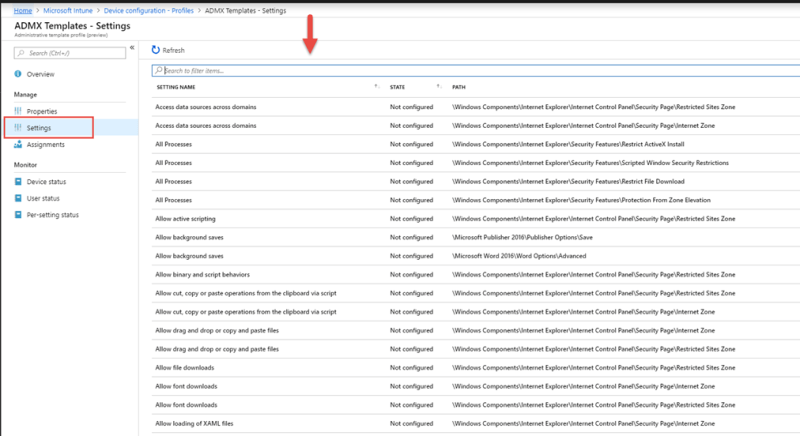
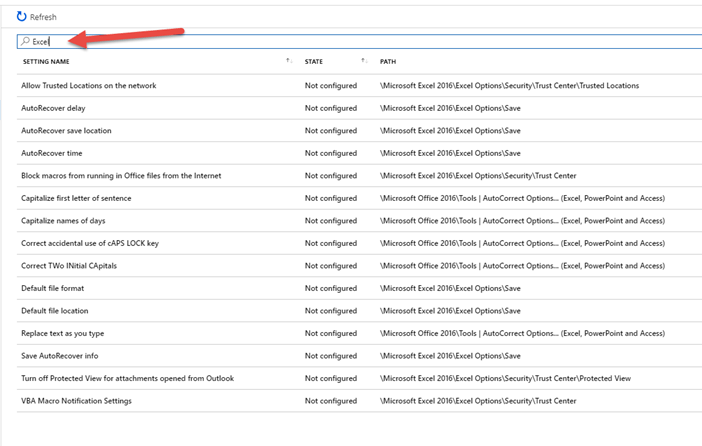
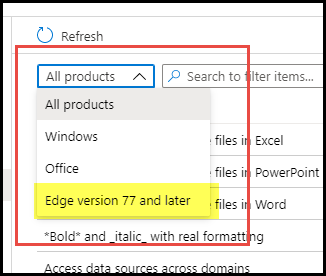
Once it is created, filter the Edge settings by dropping down the All Products list box and changing it to Edge version 77 or later.
Configure the settings for your environment you would like, such as a home page URL, security settings, etc. Once done with the profile, apply to test devices and users for testing before deploying organization-wide.

The Edge baseline policies are also available in Intune. In the top-level Microsoft Intune page, select Device Security.

Select the Microsoft Edge Baseline option, and from the baseline page, you will have the option to create a new profile based on that baseline.
If you do not have Microsoft Intune, you can follow this link to configure with other MDM providers, if you are managing Windows 10 with that MDM provider.
Jay Parekh