Windows Defender ATP – Onboarding Endpoint with Configuration Manager 1606 or higher

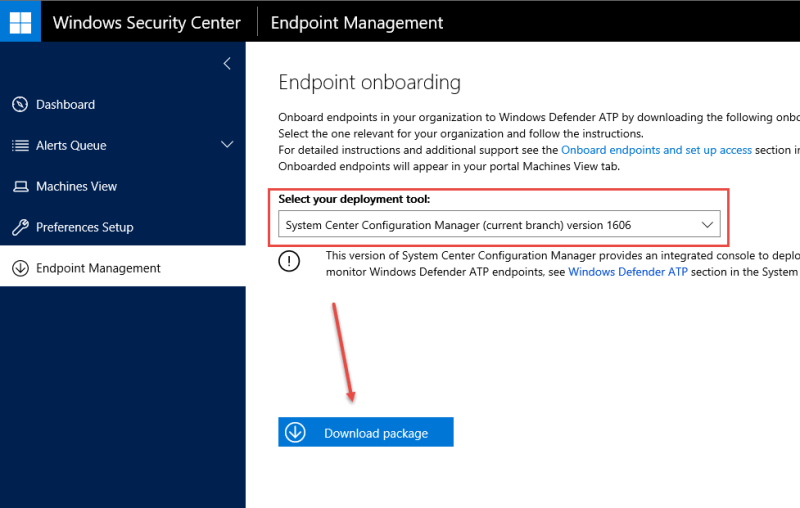
To be able to review Windows 10 endpoints (Anniversary Update or higher) into Windows Defender ATP, you will need to onboard first. There are several ways to do so including scripts, Group Policy, Intune, Configuration Manager 2012 through current branch 1602. With the release of Configuration Manager branch update 1606, it now includes integrated Windows Defender ATP to be able to monitor and deploy the policies.

  1. To get started, login to the Windows Defender ATP site to download the policies https://securitycenter.windows.com/download
  2. Choose the drop down Select your deployment tool, and select the System Center Configuration Manager (current branch) version 1606

  3. This will download a ZIP file with the onboarding package. Unzip it to where you can access it with ConfigMgr.
  4. Under Assets and Compliance, expand Endpoint Protection where you will see Windows Defender ATP Policies. Select Windows Defender ATP Policies , and click Create Windows Defender ATP Policy from the toolbar or right click.
  5. Follow the wizard to import the onboarding file you downloaded from the site. (NOTE: SCREENSHOT SHOWS OFFBOARDING, BUT SHOULD BE ONBOARDING)

  6. Once done, you will see the policies in the console. Right client or from the toolbar, click Deploy.

  7. You can do this for off-boarding as well. From the same site, you can select to download the off-boarding package and then follow the steps above to import into ConfigMgr.

Microsoft Operations Management Suite (OMS) Connector


A new feature in technical preview 1607 is the connector to OMS to allow syncing of data such as collections from ConfigMgr to OMS.

ASSUMPTION: You have knowledge of Azure and OMS configuration outside of SCCM.

  • In update 1607, you will see a new item called OMS Connector

  1. Click OMS Connector and click on Create connection to Operations Management Suite from the toolbar

  2. You will see the first dialog of the Connection to the Operations Management Suite Wizard. Click Next


  3. Enter the Tenant, Client ID, and Client secret key in the next dialog. All this information can be gathered from the Azure Portal. You may need to create a new Application (Under the Directory -> Applications) for the Client ID and key (second screen shot below).

    Once entered, you will need to click Verify to continue.


  4. Once the it’s properly verified, you will see the options to add your subscription, resource group, and Workspace name. Click Add to add the ConfigMgr collection(s) that OMS will collect the data from.


  5. Final confirmation box will show your selections.


  6. After few minutes, logon to the OMS portal (mms.microsoft.com). Do a Log Search for * Type=ComputerGroup.

    Now you will see all the computers in the selected Collection (in the above settings) display in OMS. You will see the GroupSource equal to SCCM for those machines. My OMS was configured only for this so other servers are not there yet in my lab.

If you have questions on how to create OMS Workspace, the Client ID, etc. Message me on Twitter https://twitter.com/jparekh_tech

Device Categories in Configuration Manager 1606


In Microsoft System Center Configuration Manager 1606 (Currently in Technical Preview), you can create device categories. These can be used to automatically place devices in device collections when you are using it with Microsoft Intune (Integrated/Hybrid mode). Users are then required to choose a device category when they enroll a device in Intune. You can additionally change the category of a device from the Configuration Manager console.

You can also assign a category on a non-Intune enrolled device such as a traditional domain joined PC.


Create a set of device categories

  1. In the Assets and Compliance workspace of the Configuration Manager console, expand Overview, then click Device Collections.
  2. Right Click on Device Collections and click Manage Device Categories.

  1. In the Manage Device Categories dialog box, you can create, edit, or remove categories.

Change the category of a device

  1. In the Assets and Compliance workspace of the Configuration Manager console, expand Overview, then click Devices.
  2. Select a device from the Devices list and then, in the Home tab, in the Device group, click Change Category.

  1. In the Edit Device Category dialog box, choose the category to apply to this device, then click OK.

Associate a collection with a device category

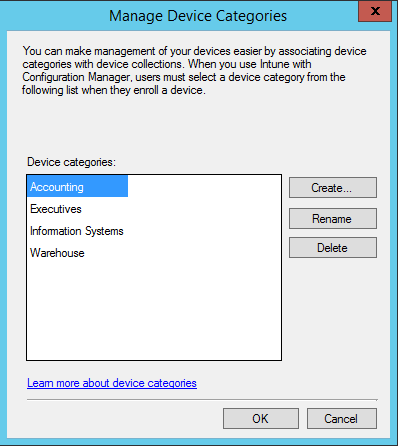
When you associate a collection with a device category, all devices in the category you specify will be added to that collection.

  1. In the Properties dialog for a device collection, click Add Rule > Device Category Rule.
  2. In the Create Device Category Membership Rule dialog box, select the category that will be applied to all devices in the collection.
  3. Close the Create Device Category Membership Rule dialog box and the collection properties dialog box.

Now all devices in the chosen Category will be dynamically be part of this collection and its associated deployments

Servicing server group features of Configuration Manager CB 1511 and 1605

Technical Preview for System Center Configuration Manager, version 1511, included the ability to create a collection where all devices in the collection make up a server group. Then, you could configure the server group settings to use when you deploy software updates to the server group, control the percentage of computers that are updated at any given time, and configure pre-deployment and post-deployment PowerShell scripts to run custom actions.

Technical Preview for System Center Configuration Manager, version 1605, adds the ability to update the computers in the server group in a specified order that you define, adds enhanced monitoring to view the status for the computers in the server group, and provides the ability to clear the deployment locks that is useful when clients have failed to install the software updates and are preventing other clients from installing their software updates.

Reference: https://technet.microsoft.com/en-us/library/mt706220.aspx


System Center Configuration Manager Vulnerability Assessment Configuration Pack

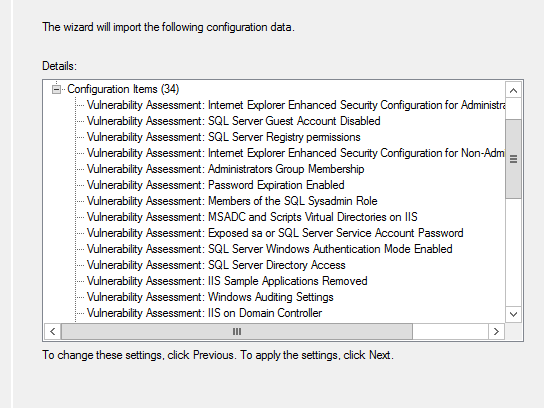
Configuration Manager Vulnerability Assessment allows to scan managed systems for common missing security updates and misconfigurations which might make client computers more vulnerable to attack.

Download here

This release includes

  • The capability to scan’s for potential security issues that may exist because of misconfigurations on the following Microsoft Product versions
  • New Vulnerability Assessment Overall Report will display
    • List of Security, Administrative and Compliance Vulnerabilities for a specific computer.
    • List of Windows Updates Vulnerabilities (if there are any)
    • List of Windows Server Vulnerabilities (if there are any)
    • List of IIS Vulnerabilities (if there are any)
    • List of SQL Vulnerabilities (if there are any)

Example checks are:

  • Are unnecessary services installed and running?
  • Do shared folders have appropriate permissions?
  • Is Windows Firewall enabled?
  • Are strong passwords enforced?
  • Are unsecured guest accounts enabled?


After downloading the pack, you will need to install it which will extract the cab file into C:\Program Files (x86)\VACP (by default).

To import the Configuration Pack

  • In the Configuration Manager console, navigate to Assets and Compliance / Compliance settings / Configuration Baselines.


  • Right-click Configuration Items, Import Configuration Data to load the Import Configuration Data Wizard.


  • Click Add, browse to C:\Program Files (x86)\VACP (unless you specified another path) and select the .cab file in the install location of the .msi, and then click Open.


  • Summary of the 34 configuration Items will be shown. Click Next to continue.


  • Follow the wizard instructions.
  • There are three base lines created from the Configuration Items. The Vulnerability Assessment Configuration Pack.docx files associated highlights the details of each base line.
  • Deploy the baselines to the proper collections as desired.


Configuration Manager 1602 Changes – Part 1


Here are few new items in the 1602 branch of Configuration Manager


  1. A new option in the Software Center that allows the user to poll the user and machine policies (without going through the Control Paten applet). In Software Center (after the new client push), a Sync Policy button has been added to the Options > Computer Maintenance page.

  1. Windows 10 Device Health Attestation. This can be enabled in Administration > Overview > Client Settings under Computer Agent

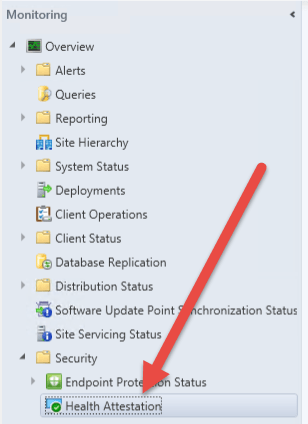
To view the device health attestation view, in the Configuration Manager console go to the Monitoring workspace of, click Security node, and then click Health Attestation.

  1. Configuration Manager sites that run version 1602 or later support the in-place upgrade of the site servers operating system from Windows Server 2008 R2 to Windows Server 2012 R2. Before you upgrade to Windows Server 2012 R2, you must uninstall WSUS 3.2 from the server.
  2. New filter options are available for Windows 10 servicing plans that allow you to filter for Language, Required, and Title. Only upgrades that meet the specified criteria will be added to the associated deployment. Prior this change, all upgrades were being downloaded regardless of language or SKU.

Chicago Systems Management Users Group (CSMUG)

After couple of years of debates to do this or not, we have decided to move forward with this group.  There is no similar group like this in Chicagoland area.  We have done topics with the Chicago Windows User Group in the past and will continue to support them in joint events.  However, the membership for a Windows user group vs. a System Center, EMS, datacenter and client management, is much different.

If you are in the Chicago area, please sign up.

http://www.meetup.com/Chicago-Systems-Management-Users-Group-CSMUG/

The group is co-founded by Rich Lilly.  Check out his blog here and follow him on Twitter

Jay @jparekh_tech

Enroll Windows 10 Enterprise Preview to Hybrid ConfigMgr + Microsoft Intune

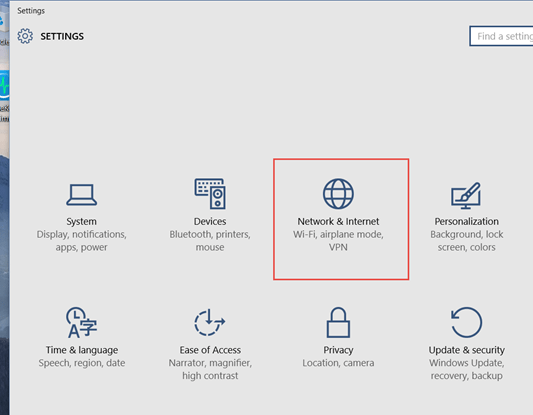
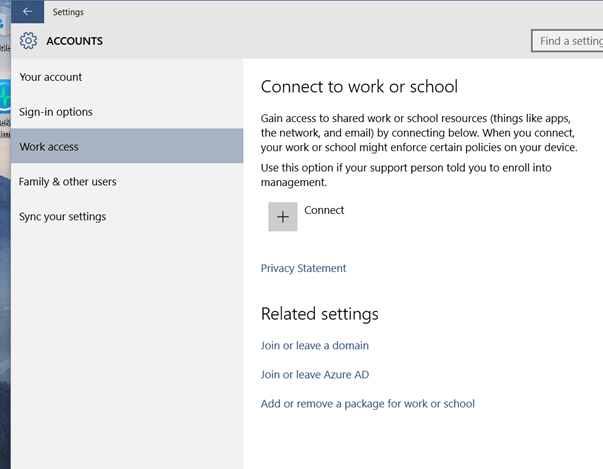
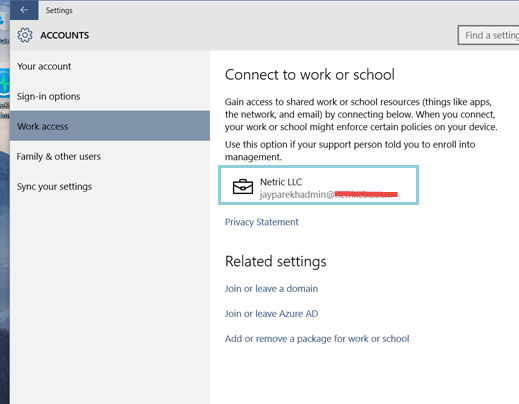
The following are quick steps to enroll the Microsoft Windows 10 Insiders Preview (as of build 10130) to Microsoft Intune in a hybrid environment with Microsoft System Center 2012 R2 SP1 Configuration Manager (SCCM).

This assume you have already configured Microsoft Intune into your SCCM environment.

  1. In the SCCM console, navigate to Administration -> Overview -> Cloud Services -> Microsoft Intune Subscriptions.
  2. On the top ribbon bar, click the Configure Platforms button. Click Windows in the drop down

  3. From the Microsoft Intune Subscription Properties, click the Enable Windows enrollment.

  1. Log onto your Windows 10 desktop, go to Settings and choose Network and Internet

  2. Click on Accounts and then Work access. On the Connect to work or school section, click the + Connect

  3. Enter your work email address that are Intune enabled (an account that has synchronization between your on-premise Active Directory and Windows Azure Active Directory). After you click continue, you will be sent to the Microsoft site to authenticate.

  4. Once done, you see the connected account on the main section.

  5. In the SCCM console, you will now be able to see your newly enrolled device as a Mobile device. You will be able to deploy applicable compliance policies just like any other mobile devices in your organization.

-Jay